Question:
How can I enjoy my DVD collections and videos on my iPod?
Answer:
iPod only accepts H.264/MP4 video formats. If you want to play your DVD (.VOB) and other videos (not H.264/MP4 video) on your iPod you should convert them to H.264/MP4.
This guide shows you how to rip dvd and converter video and then put on your iPod Touch/Nano 3/Classic and enjoy them.
It includes four parts:
Part 1: How to convert DVD to ipod (For Windows) Part 2: How to convert video to ipod (For Windows) Part 3: How to convert DVD to ipod (For Mac) Part 4: How to convert video to ipod (For Mac) Part 1: How to convert DVD to iPod Touch/Classic/Nano(For Windows)Part 1: How to Convert DVD to iPod Touch/Classic/Nano
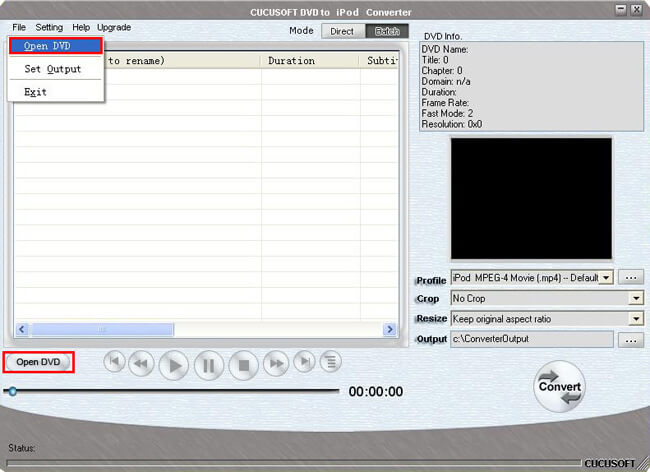
Step 0:Install and run
Cucusoft DVD to iPod Converter.
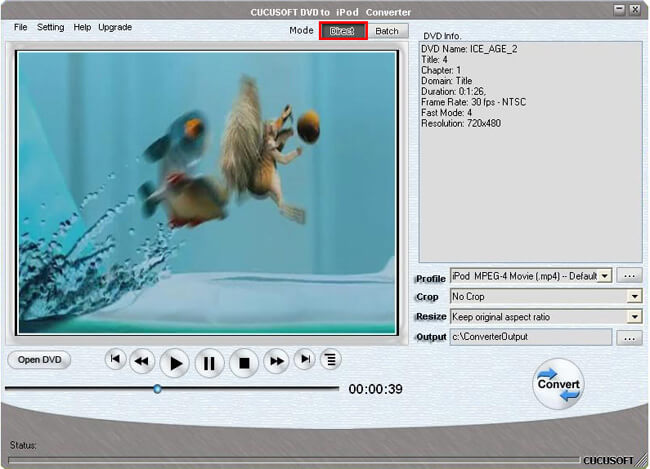
Step 1: Place the DVD into your DVD drive.
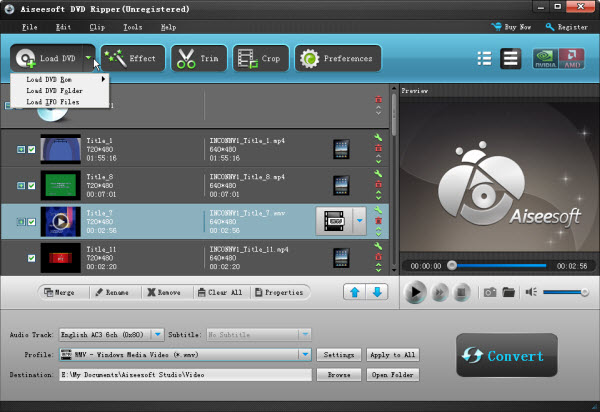
Step 2:Click the “open DVD” button to load DVD.
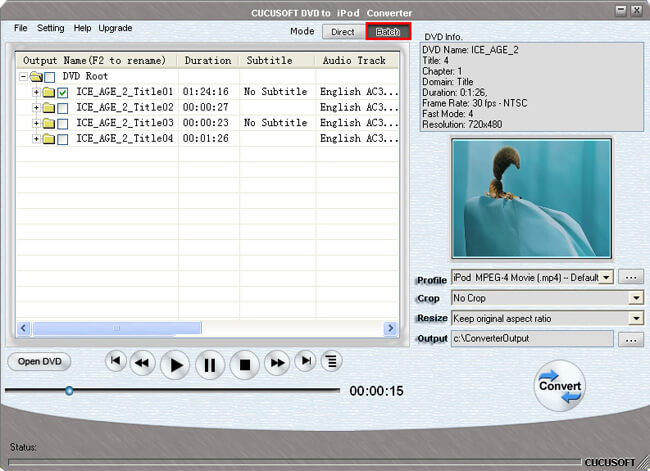
Step 3:Select "Direct mode" or "Batch Mode"
"Direct Mode" means that you can directly click the DVD Menu to select the DVD movie you want to rip. This mode is very easy for ripping a movie DVD's.
"Batch Mode" means that you can select the DVD titles/chapters and audio track they want to rip via checkbox list. This mode is very easy for batch ripping Music DVD's, MTV DVD's and Episodic DVD's.
Notes:
In "Batch Mode", you not only can select the DVD titles/chapters and audio track, but also can adjust conversion time. So It is easy for you to convert any segment of DVD.
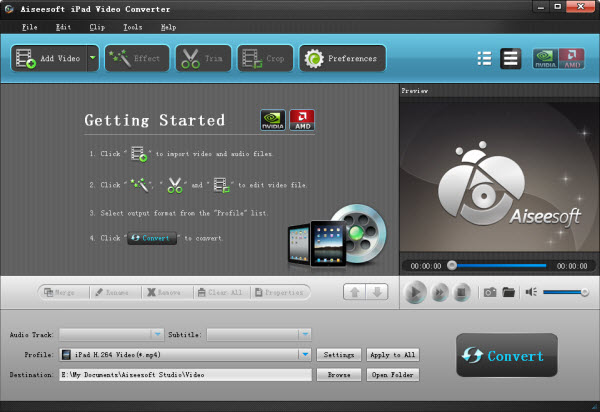
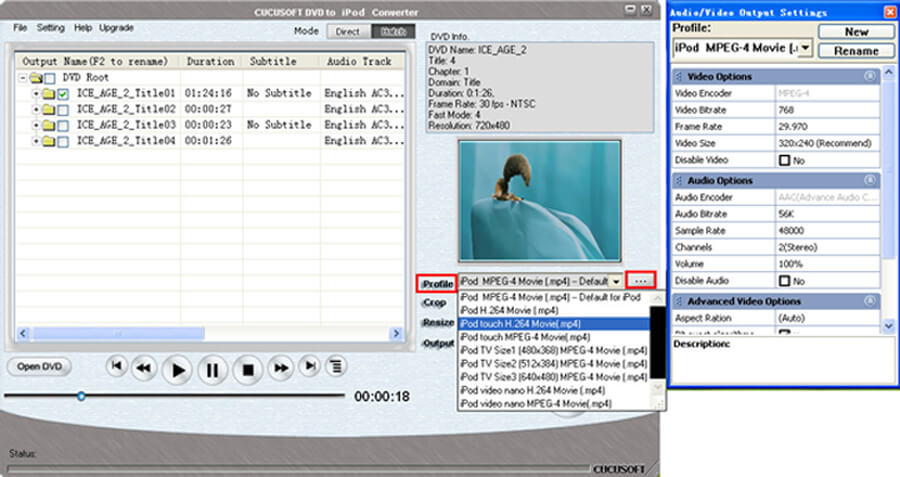
Step 4: Select output format from the "Profile" drop-down list.
Notes:
Click the "…" button at the right of the “profile” drop-down list to set the important parameters: Video Bitrate, Audio Bitrate, Frame Rate and Video Size. For a high image/sound quality you can increase the value of Video/Audio Bitirate and for a compressed file you can decrease the value.
Step 5:Click the “Convert ”button to start the conversion. You can have a cup of coffee or have a walk. In a quite short time it will finish.
Part 2. How to Convert videos to iPod Touch/Classic/NanoThis software supports almost all kinds of video formats including MP4, Tivo, Flv, MKV, DivX, XviD, MOV, dvr-ms, rm, rmvb, MPEG, WMV, AVI ... to playable video formats for iPod Touch/Classic/ Nano.
Step 0: Install and run
Cucusoft iPod Movie/Video Converter.
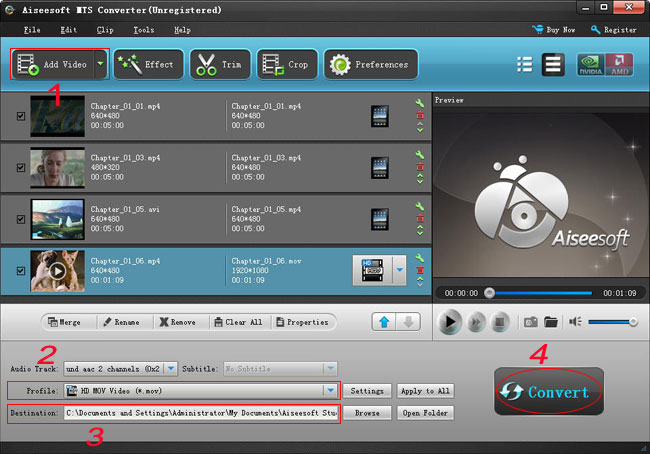
Step 1: Click the “Open file” button to add the video files you want to convert.
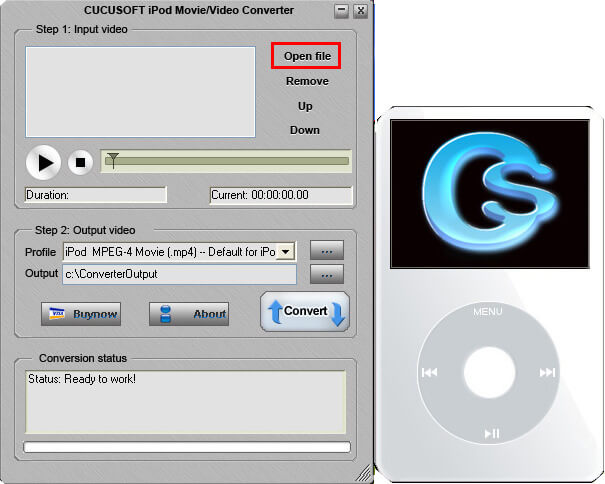
Step 2:Select output format from the "Profile" drop-down list.
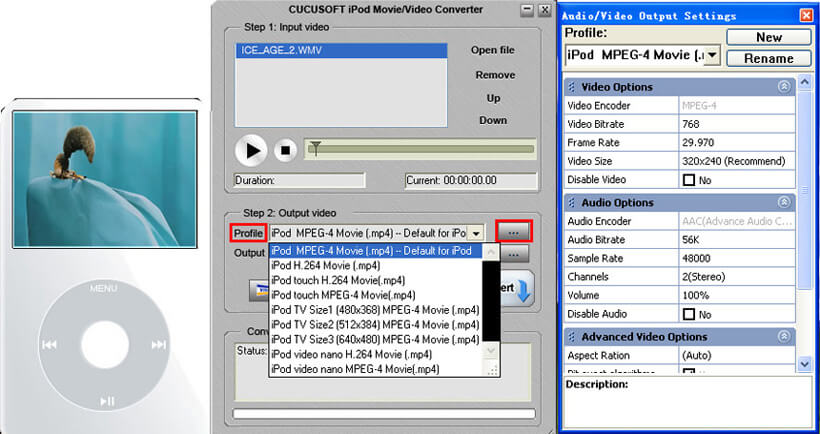
Notes:
Click the “…” button at the right of the “profile” drop-down list to set the important parameters: Video Bitrate, Audio Bitrate, Frame Rate and Video Size. For a high image/sound quality you can increase the value of Video/Audio Bitirate and for a compressed file you can decrease the value.
Step 3:Click the “Convert” button to start the conversion .In a short while the conversion will be finished.
Part 3: How to convert DVD to ipod (For Mac) iSkysoft DVD to iPod Converter for Mac is a specially designed tool for Mac OS users to easily convert DVD movies for playback on iPod. The steps below will guide you on how to use this software:
Step 0: Download
iSkysoft DVD to iPod Converter for MacStep 1: Add DVD Movie
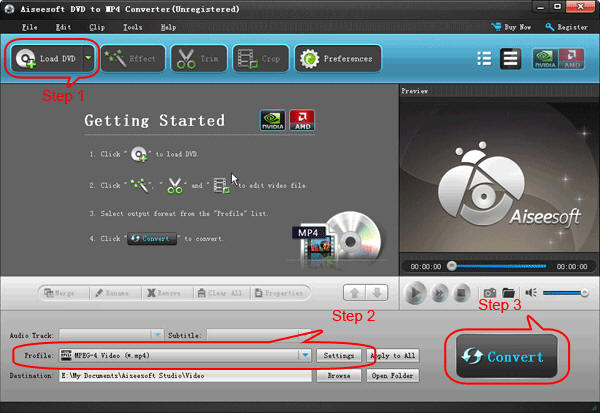
Click the Load DVD button, browse your computer, find the DVD folder of the movie you want to add from your hard disc or DVD-ROM, open your DVD folder, select the VIDEO_TS folder and click OK.
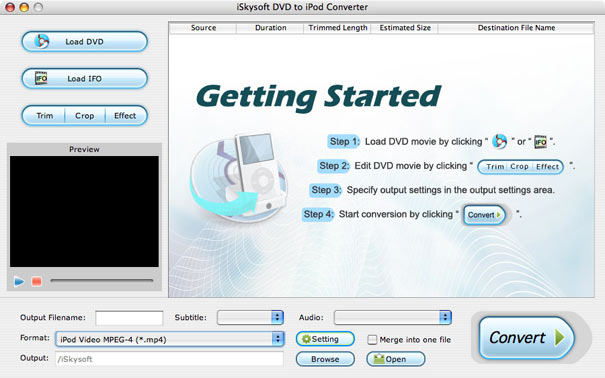
Step 2: Output Settings
At the bottom of the main window, you can name the output file for the current title/chapter, and select a subtitle to put on your movie, select an audio track. Then finish all the settings including selecting an output format, clicking the Settings button to set the video and audio encoding settings, choose if to merge the selected titles or chapters into one file, and set an output directory to save the output files.
Step 3: Start Conversion
Click the “Convert” button to start your conversion.
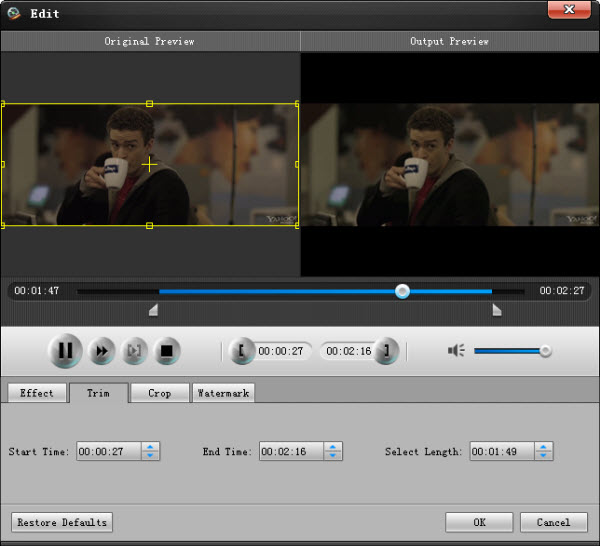
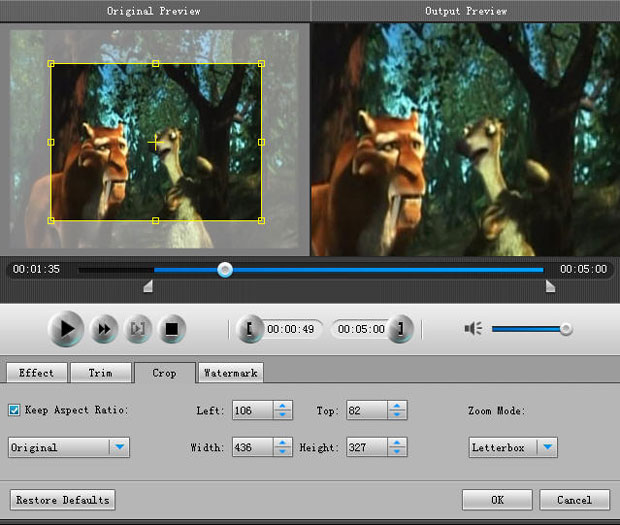
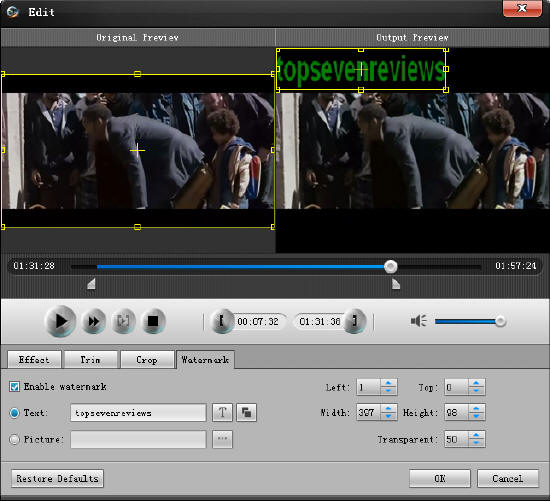
Some special functions such as “Trim”, “Effect”, “Crop” are all available you can edit your DVD with them.
Part 4: How to convert video to ipod (For Mac) Step 0: Download
iSkysoft iPod Movie Converter for Mac Step 1: Add Video files
Click the "Add Files" button to add video or audio files such as flv, avi etc. to the program by automatically selecting an appropriate encoder for the video files you want to convert to the program

Step 2: Output Settings
After you add video files, you can select an output format for each video file and specify a directory on your computer to save the output files.
Step 3: Start Conversion
Click the Convert button to start conversion and then you can just go out for a walk or take a nap, and the conversion may have been finished when you come back.
Now for all users (Windows/Mac) you can enjoy your DVD/Videos on your iPod.
Have fun!